
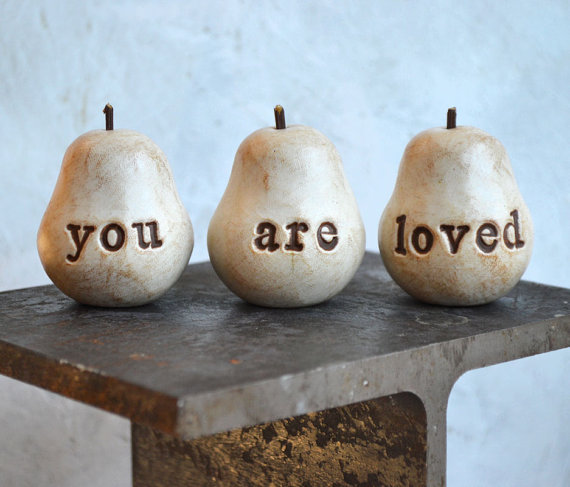
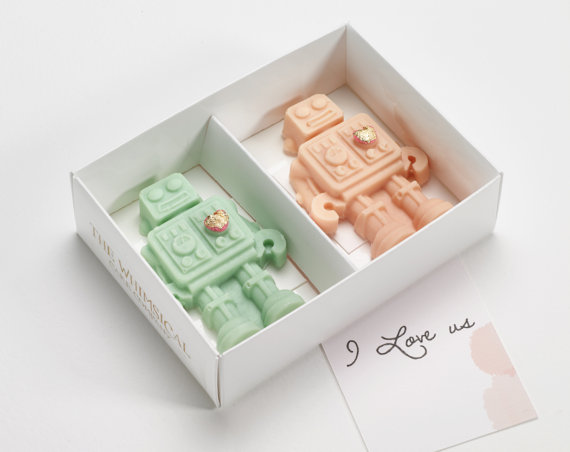
We’re doing a Valentine’s Day Edition for this week’s “Friday Finds”! Have you begun your search for love related items? Maybe these four will get you in the “mood!”


Are you thinking about offering your items in kit form? It’s a great way to get new attention to your products, but think carefully first if it is right for you! Take these tips into consideration before starting to put together that pamphlet!
This is the first major question you need to ask yourself. Is it worth selling your items in a kit? For me, with my felted animals, the answer is yes and no. I tend to sell a majority of my items at cost, with a few more complicated, popular items with markup. Those complicated animals would be for more advanced felters and might not sell as well. But if the time ever comes when I raise my squirrels a bit more, those would make the absolute perfect kits.
Take into account the cost of materials and the time and effort into designing the tutorial. Don’t forget too to think about the cost of your expertise!
Maybe you don’t want to get all involved in that material buying (remember you’ll want to buy them at wholesale/reduced prices if you can!). Maybe you just want to deal with PDFs or Youtube videos. Or consider both as an option! Here are two examples:
1. For a cross stitch pattern, it would be best to probably just do the PDF of the design. Most likely, the artist has all the thread already needed or are just missing one or two.
2. For a felting pattern, you might want to sell them as “beginner kits”. That would include all the needles, foam, and colors they would need for the particular beginner project.
This is especially something to consider if you’re selling on an online marketplace like Etsy. A buyer might be hoping to resell their finished product in their own shop. This is completely up to you. Can they sell with slight changes or embellishments? Can they use it in a larger project? Or is it strictly for personal use only? Consider copyrighting your work and include a note that they cannot redistribute your tutorial.

This seems the be the big struggle for new handmade sellers all around the board -how to accurately price your items so you’re getting what you deserve. My best advice is to not fall into the “what would I pay for this” trap. But rather realize that just because you wouldn’t pay $10 for it, it doesn’t mean someone else wouldn’t pay the $25 it is actually worth.
Here are five tips and starting points to get you on the right track of pricing your items the RIGHT way!
This one should be obvious. For me, I have to think about how much wool I used (core vs. dyed), any embellishments, and the glass black eyes. Think about every step of making the product.
Did you sew the item? Did you take into account the sewing machine, the needles, etc? What about your camera to take the product photography? This takes some thinking about and you can use several guides to calculate your overhead to take those supplies into account that you take for granted. This Simple Biz Planning worksheet is a great place to start! For me, I have to remember to think about my felting needles and all the different types of mats I may have used.
Are you paying for a website? Or selling on Etsy? You might have already included it in your “overhead costs” but don’t forget about any fees from Etsy, Amazon Handmade, Paypal, etc. Are you packing it up to mail or attending a fair? Either way, you have costs! For packing, think about the box, wrapping supplies, postage printing, and insurance. For a fair, you not only have the initial fee to take into consideration but also any decor you might be using (tent, table, shelves, etc).
This is the one most people skip or estimate on. I like to use a timer to see exactly how long it takes me to felt an animal. My projects tend to take anywhere from 45 minutes to 4 hours or longer. Multiply the number you get by your desired hourly wage.
You have the base price of your items. Now think about markup! The prior four steps were all about how much work you personally put into the piece. Do you want to sell at cost? Or at a margin?

This is part 2 of a part 2 series! Click here for part 1.
6. Don’t Undersell Yourself– This is a lesson you need to learn fast or you won’t be able to stay in business long. Make sure to take overheard costs, materials, time, and profit all into account when figuring out how to correctly price yourself. Check to see what the competition does too, but don’t fall into the trap of undercutting yourself and losing out on money just to compete. Plenty of sellers underprice and don’t let their mistake hurt you! Having trouble figuring it out? There are plenty of calculators out there designed just for this, including this one from craftybase.
7. The Ins and Outs of the USPS- This will come with time as you get more experience, but do some research into the actual cost of shipping. As of the 17th, shipping prices actually increased, so stay on top of the latest news. See what shipping method (first class, media, priority) works best for you and your items. And don’t forget about insurance! If your item gets lost in the mail, you are responsible for it.
8. Choosing a Niche and Sticking With It – This might be already solved for you or you might still be struggling. You can certainly sell a little bit of this, a little bit of that, so feel free to do that! But in my experience, you bring in the most customers when you concentrate on one area per shop. Instead of having 10 items in Category A and 7 items in Category B, you can have 17 items under one roof. It also helps your shop look cleaner and more professional if all items are related. Since my shop is a Mother-Daughter effort, we do have a bit of two worlds, but we use the same material – wool.
9. The Exciting Christmas Rush- You probably won’t have to worry about this for a bit (seeing as it is only January anyway), but I had wished I had been more prepared for this! My first Christmas rush happened the second year my shop was open. I received so many orders, online and at a craft show, that I became overwhelmed with work for a bit. And every year it has become more and more busy, but I’ve come to expect it now! Have some stock saved up for October-December and start planning your Christmas designs even earlier. It WILL pay off!
10. Have Fun – I said this earlier in the post, but try not to think of this as a “Get Rich Quick Scheme.” Because in most cases, it won’t happen like that. Selling handmade items really takes effort, work, and growth. Even with these tips, you’re going to run into a dozen other issues that you weren’t even aware existed. So relax a bit, take a breath, and realize that it doesn’t have to happen TOMORROW. If you keep working at it and keep learning, you will be satisfied with the end result! Just don’t give up! And think about why you enjoy it so much 🙂
**Have a tip of your own for new handmade sellers? Have an issue you’ve run into that you can’t quite solve? Leave it in the comments below!

I started selling on Etsy five and a half years ago and my shop was nothing like it is today (which ALWAYS needs work). When I look back on that opening day, there were dozens of things I wish I had known before I had opened the virtual doors. The mistakes helped me learn, of course, but maybe you can learn from these early lessons of mine! This is part 1 of a 2-part series.
I will cover the rest of “Things I Wish I Knew” tomorrow! Good luck on opening those shops!
